
Bios (Basic Input-Output System) emerged as a new and unique way to attack. If your hardware is breached, the entire operating system is compromised.
Private personal data can be compromised, and losing the ability to communicate with computers potentially leads to systemic damage throughout an organization.
 What is BIOS?

This device, which is located on the motherboard of computer hardware and is the most basic part of the computer in terms of functionality, although it is very small in terms of its location, is a part that controls and adjusts all the commands that the computer should do during boot-up and all the hardware operations. When any computer’s CPU boots, the bios (basic input/output system) communicates with a firmware chip. A small hardware microchip hidden in the motherboard of the computer, this bios acts as the gateway to all computer hardware and gives commands for how each piece of hardware should behave and interact. In other words, it is a part that can do many other applications, such as which devices should be read in which order while the computer is booting, which cards can be run or not, or how much voltage should be given to which device. Bios is considered one of the most valuable parts of a computing system due to its important role in the overall operating system.
Bios are formed as a result of mounting various software on the memory chips, which we call EEPROM, in a way that can work in harmony with the motherboard.
 What are the Roles and Duties of Bios?
Bios has an important role in the boot process of the computer, also known as boot. Initializes system hardware, manages ACPI, and regulates CPU temperatures during the boot process. The main responsibilities of the bios are listed below:
 Establishing Trust: The bios is responsible for verifying the integrity of all hardware components in the system as well as their identity before use. This is done with the help of Core Root of Trust Measurement (CRTM), which basically checks if the hardware is valid and its integrity has not been compromised.
Test Hardware: The secondary function of the bios is to initialize and test the hardware in the computer before it can be used. Hardware such as motherboard, chipset and memory are included in this test. This is usually performed during POST (Power-On-Self-Test).
Installing Additional Modules: Some devices included with the computer may require additional firmware to function properly. Bios enables the loading and execution of such additional firmware modules. These can be stored in the bios chip itself or some secondary storage device.
Boot Device Selection: After performing the above steps, bios, USB drives, Hard disk etc. It starts detecting a valid boot device such as When such a device is found, it will run the bootloader on that device.
Booting the OS: After that the actual boot process starts, the bootloader starts executing and loading the OS kernel into memory. Once the kernel is booted the bios transfers all control to the Operating System.
» Adjusting Part Voltages: We can change the operating voltages of the processor, ram, video card, chipset, motherboard and many more parts on the computer from the bios.
» Adjusting FSB Speeds: We can change the FSB, that is, the operating frequencies of the parts on the computer, in other words, the frequency values required for that part to work, with the bios.
» On-Off Parts: Enables activation and deactivation of cards such as audio or ethernet cards on the motherboard. In some cases we may not use these cards and we save power by turning them off.
» Displaying Operating Statistics: We can see many statistics obtained while the computer is running, such as processor temperature, processor voltage, other component voltages, motherboard temperature, fsb speeds under the bios menu.
» Making Initial Settings: While the computer is booting, it gets many basic information and settings from the bios. You can change these settings under the bios menu. In addition, settings such as time and date can be made from the bios menu.
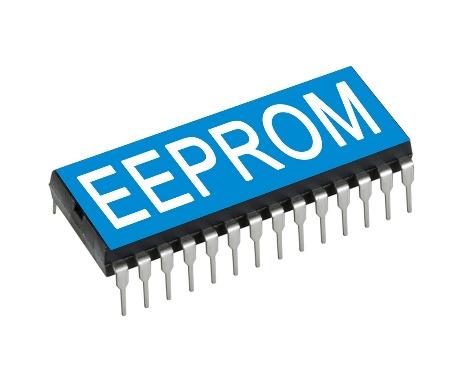
What is EEPROM?
EEPROM (Electrically Erasable Programmable Read-Only Memory) is a chip used in computers or other devices to permanently store small amounts of data. EEPROM has the ability to be written and erased electrically.
The most advanced of the erasable and programmable memories are the electrically erasable Read-Only Memory. In these memories, a desired value can be written to the memory cells and this written information remains until a new write.
 Another reason why EEPROM is thought to be more effective is; flash memory has to erase multiple memory regions at the same time. To change just one byte, it is necessary to delete the entire block and rewrite it. This is the reason why flash memory wears out quickly. More economical methods such as flash memory are used to store fixed data with larger size.
EEPROM requires a structure with 2 transistors per bit to erase a particular byte in memory, while flash memory has 1 transistor per bit to erase a region of memory. EEPROM technology, credit card, SIM card, keyless entry etc. Some devices have security protection mechanisms such as copy protection.
How to Open Bios Menu?
Generally, many of the manufacturers preferred to use the same method. After turning on the computer, we can access the bios menu by constantly pressing or holding the Delete key. However, since some manufacturers offer different access methods, it may be necessary to press keys such as F1, F2, F10, ESC while the computer is booting.
How to Make Bios Settings?
After logging into the Bios menu, the main menu appears where we can make adjustments.
All adjustments are made through these menus. Even if the menu shapes are different, let us give you some information about the menus and their submenus in this picture, as there is usually a similar name;
 » Main: Menu with simple settings and information. The submenus are below;
– System Time: You can set the time here.
– System Date: You can set the date here.
– Primary Master: It is the first drive of the first partition.
– Primary Slave: It is the second drive of the first partition.
– Keyboard Features: Keyboard settings are made here.
– System Memory: Bios is the memory size that cannot be changed.
– Extended Memory: Bios is an additional memory size.
» Advanced: Advanced bios settings are made in this section.
– Internal Mouse: It is the touch mouse setting.
– LCD Panel View Expansion: It is the display feature developed for LCD monitors.
– Silent Boot: Boot features are determined here.
– USB Operation Mode: Your USB speed is set here.
– Remote Power On: To enable you to turn on the computer over LAN.
– Legacy USB Support: It is USB bus support.
» Security: Bios security settings are made in this section.
– Set Supervisor Password: With this password, only users who know the password will be able to enter the bios setting menu. Normally there is no password.
– Set User Password: This password is only the menu access password. Once entered, you will not be asked again to make changes. Supervisor password must be determined before this password. When logging in with this password, some menus will not be active.
– Password on boot: In this section, when either of the above two passwords is entered and this section is activated, even if the computer does not enter the boot menu, you cannot continue without entering this password while booting. To unlock the computer, simply enter one of the passwords you created above.
– Fixed disk boot sector: It provides protection against boot sector viruses. When Write Protect is active, the protection is activated.
» Boot: This section determines which drivers should be read in what order during the computer’s startup. It has options such as Diskette Drive, ATAPI CD-ROM Drive, Network, Hard Drive. Whichever of these we want to start first, we should move it first.
Setting Startup Drive: Determines which drive should be read first when the computer boots up. Normally, the priority in this setting is the hard disk, but in some cases it is preferred to set the first boot, that is, the first drive, as cd rom.
Bios Security
In some cases, the bios may be damaged by the operation of the operating system or by harmful viruses, and data loss may occur.
Many of the vulnerabilities in the operating system were closed and online access was restricted. Apart from these, some motherboard manufacturers activate the dual bios system, which they call dual bios, to prevent data loss.
With this method, there is a second backup bios (backup bios) with the same features on the same motherboard. Every setting made is automatically transferred to this bios. If there is a problem in the main bios, the second bios will step in and transfer the backup to the main bios and the problem will be solved.
There are several bios security features that are widely available. Drive encryption is used to encrypt hard drives to prevent data access. Secure boot ensures that devices only boot a trusted operating system. bios passwords allow different levels of bios access.
Common Bios threats
Bios is always written to a non-volatile storage device such as EEPROM, which allows the contents of the ROM to be overwritten to offer bug fixes and updates for the specific bios version. However, this also has great potential for abuse, such that it could be the ability to modify the contents of the ROM disk if malicious programs are given adequate access.
User Initiated Attack
This type of attack is carried out by the end user using an unauthenticated file to update the bios. This can be done by an end user or a malicious user with no prior knowledge of the update file.
Malware Attack
Malware attacks can be used to exploit the vulnerability in the bios. The attacker opens a backdoor to the system and uses a vulnerable update version of the bios, causing the bios to crash.
Network-Based or Organizational Attack
This is a large-scale and vital attack on an organizational basis. An attacker accessing a compromised update server can perform an enterprise-wide attack and infect entire systems, distributing all authorized bios versions to malicious ones.
Some important attacks against bios systems are:
Chernobyl Attack (1998) – Also known as CIH or Spacefiller, it was the first major attack on bios systems. This virus loads into Windows memory and binds to file access calls and infects all currently executing programs. Then the virus tries to flash it by filling the bios rom with zeros. Other payload infects the Master Boot Record (MBR), filling the first megabyte of the hard disk with zeros.
 Mebromi (2012) – consists of bios rootkit, MBR rootkit, Trojan downloader and PE infector. This Trojan deletes a certain registry value and checks the bios generator. The bounty bios, on the other hand, infects the bios ROM and in turn infects the Master BOOT Record (MBR) and modifies it to allow execution of an infected program each time the Operating System is booted.
 How do we mitigate common Bios Threats?
This section describes the security measures that an organization must implement to secure the bios. Since the vulnerability in the bios is a critical point for a system, it is important for every organization to follow the predefined guidelines for securing the Bios build. The following method can be implemented in an enterprise structure to increase bios security.
To overcome malicious attacks against the bios, we can apply the following methods:
- Digital Authentication Method
- Rollback Prevention Method
- Physical Authentication MethodPhysical Authentication Method
Automatic Authentication Method
In this method, the authenticity of the bios can be ensured through digital signatures. Here bios updates should be installed only if their authenticity is verified. Here, digitally signed embedded update images produced by bios manufacturers will be the final authorization level. This process can be automated using a signature verification algorithm that ensures the validity of digital signatures. This digital authentication method should be integrated, providing strong security features.
Rollback Prevention Method
It is the implementation of a mechanism that ensures that the update images of the bios are not rolled back to previous versions. This method ensures that if an update image is to be installed, the version number is greater than the current one. This can ensure that the bios version is not backed up to a previous image containing the vulnerability..
However, in some cases, it may be necessary to roll back the current higher version to a previous lower version. So this may be required if the current updated version of the bios contains security vulnerability and there are no higher version updates to install and the previous lower version is more stable than the current one. In this case, the relevant authority should make sure that the lower version does not contain any vulnerabilities.
Physical Authentication MethodPhysical Authentication Method
This method checks the authenticity of the updated images by ensuring the physical presence of the relevant authority (system administrator). Here the authorities can verify the update images and update the bios if the image is valid. This method can be used as a subsidiary of the digital authentication method, providing it as a recovery mechanism in situations such as bios crashes.

I forgot the bios password, what should I do?
What you need to do is to remove the bios battery while the computer is turned off and unplugged, and after waiting 5 minutes, insert it again. After this process, your bios settings will return to their original state, that is, the bios default.
I made a mistake while setting the bios, what should I do?
What you need to do is to enter the bios menu and find the Load Defaults section and return to the bios defaults settings. After making this adjustment, save the changes and exit and restart the computer.
Important: Since the changes you will make regarding the Bios can affect your hardware in the first degree, you can damage your parts or even make them unusable with incorrect operations. Before making changes to prevent them, do a thorough research and even ask for help from knowledgeable people, if any. Since the companies will not be responsible for hardware problems that may occur due to such reasons, they are out of warranty and you may suffer material and moral damages due to information loss that may occur.
WHAT IS CMOS?
CMOS, long name Complimentary Metal Oxide Semiconductor memory type. The changes you make in the BIOS setting screens are saved to this CMOS chip. There is a battery on your motherboard so that the information inside the chip is not lost when the system is turned off, this battery can feed the CMOS chip for years. You know, sometimes you hear users complain that “bios does not save my system settings, settings are reset every time the system is turned on”. The reason for these complaints is that either the CMOS is faulty or the battery forgets the information saved in it.
 Sometimes users make a wrong setting in the bios Setup and their system will not boot. That's when we advise "reset the bios". In fact, what we recommend is not resetting the bios, if we could do that, our system would be inoperable. What is meant here is to reset the data contained in the CMOS that we have just introduced, where the bios settings are saved, and to enable the system to boot with default settings.
Current motherboards have a bridge labeled "CMOS Clear" or "CLR RTC", this bridge is usually near the Flash ROM chip where the bios is stored. The easiest and safest way to locate this bridge is to refer to your motherboard's manual. When you close this bridge, that is, when you connect the two ends with the help of a small piece we call a jumper or a screwdriver tip, all the information stored in the CMOS is gone and all the tweaks you have made to the system are reset.
What is UEFI mode?
Unified Extensible Firmware Interface (UEFI) is a publicly available specification that defines the software interface between an operating system and platform firmware. UEFI can support remote identification and repair of computers even if the operating system is not installed.
The UEFI boot process is very similar to the traditional bios boot process with a few minor changes. The process is divided into stages that take place sequentially and ends with the complete transfer of control to the operating system. UEFI boot runs in 32-bit or 64-bit protected mode on the CPU, not in 16-bit mode unlike the old bios.
UEFI also starts with a small amount of code that initiates the execution of the entire boot process, this stage is called the Security stage (SEC) and acts as the kernel root of trust. This is followed by Pre-EFI initialization (PEI), this mode is similar to Legacy bios pre-boot initialization phase where device firmware is checked before booting. Next, the Driver execution environment is started, where the actual initialization of the extra device drivers takes place, and devices such as network cards and graphics cards are checked at this stage.
The boot device is selected in the BDS (Boot Device Selection) step. This then transfers control to the bootloader located on a GPT partition, which performs the loading of the operating system kernel into memory.
 Differences between UEFI and Bios

There are many differences between traditional bios and UEFI systems, most of which add more functionality and power to the computer. It also provides a more efficient and secure boot mechanism.
Larger Address Space: Traditional bios forced to run in 16-bit mode with a maximum of 1mb addressable space. UEFI allows operation in 32 and 64 bit mode which allows larger and more sophisticated programs to be run by UEFI.
Support for Larger Filesystems: Traditional bios only supports booting disks with MBR partitions. MBR partition schemes only support 4 partitions per disk and a maximum size of 2TB. UEFI supports booting GPT partitions (GUID partitions), which allows booting extremely large disks up to 8Zb.
Enhanced Security Features: The UEFI specification also improves the security aspects of legacy bios systems. It supports various security features such as secure boot, it also has provisions to provide basic encryption and public key infrastructure.
CPU-independent design: UEFI has used a CPU-independent design methodology, meaning it can work on many different types of architecture. The available code is compiled differently for the required platform.
Powerful Execution Environment: The UEFI specification provides a much more powerful execution environment for computers. It allows special features like booting over a network, using the mouse, ACPI control and even web browsing.
Improved Performance: UEFI-compliant operating systems have been found to have a significant performance boost not only during the boot process, but also during system startup and shutdown.
Bios Version No Programs Learning
The way to find out the bios version programmatically is very simple. After opening the Start-Run tool, type “msinfo32” into the tool and confirm the operation. In the window that appears, you can learn both the version of your motherboard and the bios version from the BIOS Version/Date and Base Board Product sections.
Another method to find out the bios version without a program is to learn from the command prompt. Open the command prompt by typing “CMD” into the Start-Run tool. After copying the codes we shared below, you can directly reflect the code to the screen by right-clicking on the command prompt. After the codes below appear on the screen, simply press the enter key.
wmic bios get smbiosbiosversion
wmic bios get biosversion
wmic bios get version


